Simple Node.js web server on DigitalOcean
With DigitalOcean you can deploy your very own cloud based server in a very short time. This makes is perfect for hosting web apps. You can use Node.js to run as a web server and serve files and responses to the client. Setting up a Node.js powered web server is relatively easy when using DigitalOcean.
In this article I’ll guide you from setting up a DigitalOcean droplet to running a simple HTTP static file server in Node.js.
You can use Node.js to act as a static file server. It receives a request for a file, and Node.js returns the file contents. It’s very basic and standard functionality you see in most HTTP servers like Apache and nginx.
In order to get the web server running we need to do four things:
- Sign up for DigitalOcean
- Create a Droplet from a predefined image
- Install a Node.js web server on your droplet
- Create startup script to run your application as a service
##1. Sign up for DigitalOcean
First things first, in order to follow this tutorial you’ll have to register for an account at DigitalOcean. With this referral link you’ll get $10 in credits for free!
You can skip this step if you’re already signed up.
- Create a Droplet from a predefined image
Once you’re signed up and logged in to your account, you’ll end up on the list of droplets you own. If you’re new it should be an empty list.
Go ahead and press the big green ‘create’ or blue ‘create droplet’ button to create a new droplet.
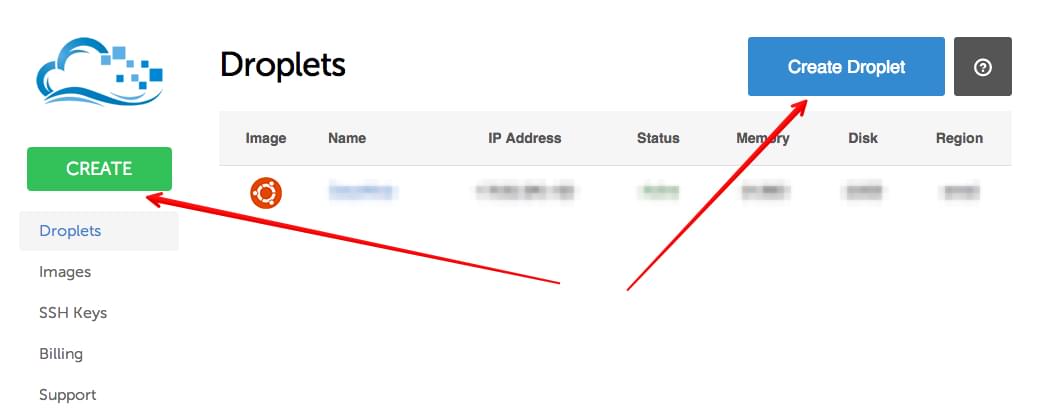 Create new droplet in Digital Ocean
Enter a host name for your droplet. Choose a size and region.
The smallest size plan is big enough for most simple applications and the static server we’re making works great on this plan.
It’s probably smart to choose a region that is close to you or where the application is mostly used.
Now select the predefined Node.js image. It runs on Ubuntu 14.04 at the time of writing.
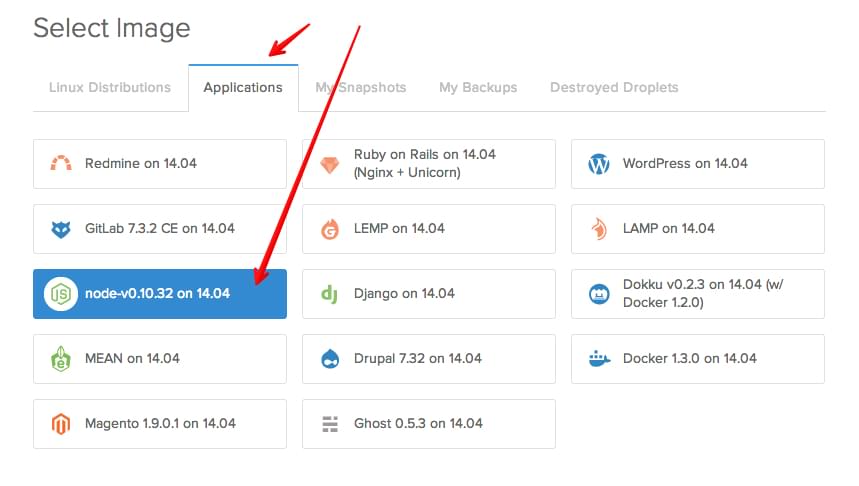 Select the Node.js image
Hit ‘create droplet’ at the bottom of the page and your droplet will be created.
- Install a Node.js web server on your droplet
When DigitalOcean is done creating your droplet, you should receive an email with the ip address of the droplet, the username and the password. These are used to login to your droplet using ssh.
Open up terminal or something similar that enables terminal access to external server through ssh.
Connect to the server by executing the following line, replace username and ipaddress with the credentials in the email you got.
ssh username@ipaddressEnter the password you got in the email. You should now be logged in to your droplet through ssh.
We need to make a place for the Node.js application and the folder with files that will be served. Create a folder called /var/www/ and navigate to that folder.
mkdir /var/www
cd /var/www
The application will be using npm for its dependencies. The application will essentially be a Node.js app which listens to incoming requests to the server while it’s running.
Connect is a perfectly fine middleware to handle those requests. We can add other middleware to connect so that it does more for us. In the example in the GitHub readme of connect you can see they use compression to compress the response. This is used as a middleware in connect. serve-static is the middleware that handles static file requests. We’ll use these packages in this example.
Init the project.
npm initAnswer the questions and then install the dependencies.
npm install --save compression connect http serve-staticThe following simple server application script is based on connect’s readme, but stripped down for our needs.
Place to following code in a file called server.js. (By doing vim server.js)
var connect = require('connect');
var http = require('http');
var app = connect();

var compression = require('compression')
app.use(compression())

var static = require('serve-static');
app.use(static(__dirname + "/httpdocs"));

http.createServer(app).listen(process.env.PORT || 80);
To start the web server, execute the script using Node.js.
node server.jsAll the files that are in /var/www/httpdocs will now be available publicly. You can adjust the folder name by adjusting it in the script. You can also put in an absolute path to a folder if you’d like.
To stop running the server (do so for the purpose of this tutorial) press ctrl + c.
Next up is making the server execute the script on startup or reboot. So when something goes wrong you don’t have to manually rerun the Node.js script.
- Create startup script to run your application as a service
To run the Node.js powered web server as a service, we can use Upstart. Upstart provides an easy and scriptable way to add your own daemons.
It will run commands on startup and power down of the server, which will be perfect in this situation.
Create a file called node-server.conf in /etc/init/.
vim /etc/init/node-server.confThe following script is an adjustment of Kevin van Zonneveld’s Upstart script.
Place the contents in the file that you just opened in vim.
description "node.js server"
author      "Your name"

# used to be: start on startup
# until we found some mounts weren't ready yet while booting:
start on started mountall
stop on shutdown

# Automatically Respawn:
respawn
respawn limit 99 5

script
    # Not sure why $HOME is needed, but we found that it is:
    export HOME="/root"

    exec /usr/local/bin/node /var/www/server.js >> /var/log/node.log 2>&1
end script
Note that at the end of the script /var/www/server.js is executed by Node.js. If you saved the file on a different location, you can change the path.
To start the service that was just created type the following command.
start node-serverThat’s it!
Summary
You now know how to create your own droplet using DigitalOcean and how to run a simple HTTP server on it. To access the files through your Internet browser you can go to the ip address of your droplet directly.
Suggestions for a better, safer solution are welcome. Reach out on Twitter or use my contact form.